The short answer
To run power to a shed, pick one of three routes by load: a temporary outdoor cord, a new buried circuit from your panel, or a buried feeder to a subpanel in the shed. Buried cable depth runs from 6 to 24 inches by method, and the model residential code requires a permit to install electrical systems.
To run power to a shed, choose a route by what you plan to plug in. A battery charger and a light can live on a temporary outdoor cord. A bench with a saw, a dust collector or a heater needs a permanent circuit. A shed that will act as a workshop is better served by a subpanel. Then pull the permit, call 811, dig, pull the cable, and finish the inside.
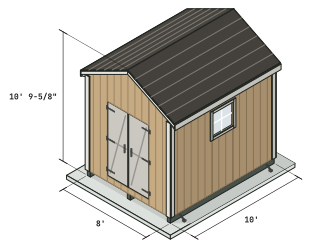
This guide walks that order. It gives you the cable and trench choices, the permit question, the inside layout and what to do before you insulate. The shed designer does not draw electrical, so no drawing here shows wiring. It draws the building you are wiring into, and the box and cable sizes come from your electrician and your inspector.
Pick your route
There are three honest ways to get power to a shed. They differ in cost, permanence and the load they can carry.
Option 1: a temporary extension cord
An outdoor-rated extension cord from a GFCI-protected outdoor receptacle is the cheapest route. It has one real use: a light, a charger or a radio now and then. A cord lying across the yard is exposed to mowers, rain, kids and frost. Do not run it under a door and leave it there for months. If you catch yourself reaching for the cord every weekend, the shed needs a permanent line.
Option 2: a new buried circuit from the house
This is a dedicated branch circuit from your main panel to the shed. It runs through the house wall, out through conduit, along a trench and into the shed. It suits lights, outlets and a few light tools. The size of the breaker sets the ceiling for what you can run, so it is the right choice for a storage or garden shed, not for a machine shop.
Option 3: a feeder to a subpanel in the shed
A feeder is a larger cable from the house to a small panel inside the shed. From that subpanel you run several branch circuits: lights on one, outlets on another, a heater or a compressor on its own. This route costs more and almost always needs a licensed electrician, but it is the one that scales. If you may add tools later, wire the shed once for the load you will have in five years.
Plan the load before you buy cable
Make a list of everything you will plug in and which of it runs at the same time. Lights draw little. Charging a battery tool draws little. A table saw, a compressor or any space heater draws a lot, and two of those at once will trip a small circuit.
Add up what runs together
Write the tools on a sheet with their label ratings. The label on each tool states its amps or watts. Add the ones you would run together, not the whole list. That total is your working load.
20 amp circuit or subpanel
A dedicated 20-amp circuit is a common size for a shed with lights and outlets. Family Handyman describes the shallowest buried option as a circuit protected by a breaker or fuse rated no higher than 20 amperes. If your working load goes past one circuit, step up to a subpanel. This is also where your house panel matters: it must have a free slot and enough capacity for the new feed. An electrician can read that from your panel in minutes, and we cannot tell you from here.
Permit and who does the work
The model residential code is direct about electrical work. The 2021 International Residential Code1, section R105.1, says anyone who intends to install or alter an electrical system regulated by the code must apply to the building official and obtain a permit first. The model code’s building permit exemption for a small shed (the 200 sq ft rule covered in the shed permits guide) applies to the building itself, not to wiring that goes into it.
What a permit usually means
This Old House says most jurisdictions require electrical permits and inspections for underground wiring work to a detached building. In practice the inspector wants to see the open trench and the cable or conduit before you backfill. Plan for that: do not fill the trench until the inspection is signed.
Homeowner or licensed electrician
Who may do the work varies. Some states let a homeowner wire their own property with a permit. Others require a licensed electrician for any permanent line. Summit College notes that the actual rules are set locally and are specific to each state, and that the National Electrical Code is the minimum standard. We do not give a state list because we have not read every state’s rule. Check with your local building department, and ask them which edition of the NEC your town enforces.
What an electrician costs
Angi’s cost guide, updated October 2026, puts the national average for running electricity to a shed or detached garage at $2,500. Most homeowners pay between $1,000 and $3,800, and the range runs from about $500 to $7,000. Distance from the main panel is the biggest factor:
| Distance from the panel | Angi’s range |
|---|---|
| 50 ft | $500 to $1,250 |
| 100 ft | $1,000 to $2,500 |
| 150 ft | $1,500 to $3,800 |
| 200 ft | $2,000 to $5,000 |
| 250 ft | $2,500 to $6,250 |
Angi adds $5 to $12 per linear foot for digging the trench, and notes that some electricians open drywall but do not repair it. Digging the trench yourself and leaving it open for the electrician and the inspector is the usual way to bring the quote down, if your electrician agrees.
If you hire out the whole job, you still benefit from knowing the steps, because you can read a quote and spot what is missing.
- 1International Code Council 2021 International Residential Code, Chapter 1: Scope and Administration
Pick the cable and conduit
Two systems are common for a buried run. The choice drives how deep you dig.
Direct-burial cable
Family Handyman names Type UF and Type UF-B as direct-buried cable, made for burial without conduit. Wherever it comes up out of the ground or runs along a wall, it needs conduit to protect it from damage. This Old House says the same: anywhere the wire is exposed above ground it must be protected with conduit.
Wires in conduit
The second system is individual insulated wires pulled through conduit. Family Handyman says the wires must be rated for use in a wet location, such as THWN-2, because conduit buried in soil can hold water. PVC conduit is easy to cut and glue. Galvanized rigid metal conduit is tougher and can sit shallower. Summit College puts rigid metal conduit at about $0.77 per foot for the half-inch size and $1.16 for the three-quarter-inch size, undated, so treat it as a ballpark and price your own at the store.
Inside or outside the wall
Where the line reaches the house, the same rule applies: protected cable on the outside, then a fitting where it goes through the wall to the panel. Where it reaches the shed, it enters through the wall or the rim at the base. Plan that entry before you build the wall so you can place the hole between studs. The frame shed walls guide shows how a wall goes together.
Dig the trench
Call 811 first. Family Handyman says that in the U.S. you call 811 or visit call811.com to have your utilities marked. The service is free. Wait for the marks before the shovel goes in.
Trench depth by method
Family Handyman lists four options for a buried residential run. Verify them against the code edition your town enforces, because the NEC is a paid standard we have not read, and local rules can add to these.
| Method | Cover depth | Condition |
|---|---|---|
| Galvanized rigid metal conduit with individual insulated wires | 6 inches | |
| GFCI-protected Type UF cable | 12 inches | Circuit GFCI-protected before it enters the ground, breaker or fuse no higher than 20 amperes |
| PVC conduit with individual insulated wires | 18 inches | |
| Type UF cable for the whole run | 24 inches | At the transition from above ground, 18 inches of cover |
Source: Family Handyman, John Williamson, updated September 23, 2025. The article does not name an NEC edition.
The 12-inch row is the one people quote, and it carries conditions. It is for a circuit up to 20 amperes with GFCI protection before the cable goes underground. A subpanel feeder is larger, so do not assume the shallow depth applies to it. Ask your inspector. For a run you will bury once, digging deeper than the minimum costs little and puts the line farther from a spade.
Digging and backfill
A rented trenching machine does the job fast. This Old House says a trenching machine can dig at least 12 inches deep from house to garage, and tells you to check local codes for the specifics. Keep the bottom of the trench clean of sharp rock, lay the cable or conduit, and backfill in layers. If the trench stays open for days, put barricades around it, as Family Handyman advises.
Where the trench should run
Run the trench straight and away from your plans: not through the future garden bed, not through a tree’s root zone and not under a place where you may later pour a patio. Mark where it goes on a sketch of the yard and keep that sketch. The line is invisible after backfill, and the next person to dig needs to know where it is.
Inside the shed
A buried line is half the job. The inside decides whether the power is useful and safe.
Boxes, outlets and GFCI
Mount boxes to the studs at heights you will actually use: switches near the door, outlets above the bench line, a light over the work area. Use boxes and covers made for the location, and put GFCI protection where your inspector says. The circuit in the shallow-trench option must be GFCI-protected before it enters the ground, so a GFCI breaker at the panel or a GFCI receptacle first in line satisfies that. Ask your electrician which they prefer for your setup.
Where the cable enters the wall
Bring the conduit up to the wall at the spot you planned, through the bottom plate or rim, and into a box or panel inside. Seal the opening so water, insects and mice cannot follow the cable in. See how to frame shed walls for plate and stud layout, and the shed foundation guide if your cable has to cross a base. On a concrete slab, the conduit has to be set before the pour, so decide where it comes in first. On a shed on skids, the cable can come up beside the floor frame.
Do this before you insulate
Wiring goes in before the insulation, not after. Once the insulation and the interior panels are up, every extra outlet means cutting into finished work. Rough in the boxes and cable, get the inspection if one is required, and only then follow the insulation guide. Insulation also changes how warm and damp the cable runs, so run it past your electrician if you plan to insulate around a subpanel.
Solar as an alternative
If the trench is too hard or too expensive, a self-contained solar kit with a battery can run lights and small chargers with no cable to the house. It suits a shed far from the house or in a spot where digging is a problem. We have not read a price or output figure for kits we could cite, so size one by listing your loads and checking the maker’s specifications. For anything that heats, cuts or compresses, a buried line is still the practical route.
Safety
Before you touch any wire
Switch off the breaker that feeds the line at the main panel, then test the wires with a tester to confirm they are dead before you touch them. Do not rely on the switch alone. Never work on a live panel. If you are not sure what is live, stop and call a licensed electrician. Keep power off at the panel until the inspector has passed the work and every cover is on.
What to buy
A kit with the conduit, fittings, glue, cable clamps and cable of the right type for your run saves trips, and most home centers sell the parts in one aisle. Match the cable to the method in the table, buy a little more than your measured length, and let your electrician or inspector confirm the list before you start.
Common mistakes
A few errors show up again and again, and all are cheap to avoid.
Skipping the plan
Buying cable before you know the load. A bench with tools later means a circuit that is too small and a trench that needs digging twice.
Burying before inspection
Backfilling before the inspector has seen the trench can mean digging it open again.
Leaving cable unprotected
Cable that comes out of the ground without conduit is exposed to a string trimmer on its first summer. Protect it where it transitions.
Where to go next
Wire first, then insulate and finish. Start with the shed permits guide to ask the right questions at the building department. Then look at the shed foundation guide so the cable entry fits your base. If you are still choosing the shed, the shed designer draws walls, doors and windows, so you can place the entry point on paper before you cut the first hole. Its drawings do not include wiring.
Sources
Every number in this guide that does not come from our own shed designer was checked against these 4 documents, numbered in the order the text first cites them and read between Sep 29, 2026 and Oct 29, 2026. 4 are codes, agencies, makers and stores.
- 1International Code Council2021 International Residential Code, Chapter 1: Scope and Administration
- 2Family HandymanBury Underground Electrical Wire Like a Pro
- 3Summit CollegeWhat to Know Before You Run Electrical Power to a Shed
- 4This Old HouseHow To Run Underground Wiring to a Garage